
|
Photo Gallery: |
|
| Your location: Rideau Region > Rideau Waterway Home > Photo Gallery > Infrared |

| These photographs are taken in the near-infrared spectrum. In general, it means that things that refract infrared such as leaves and clouds will be white and things that absorb infrared such as water and blue sky will be black. Contrast is generally increased with soft highlights and deep shadows. The effect is not for everyone, but I personally like the results. For the photo buff interested in IR photography see the technical notes below. |
 |
 |
 |
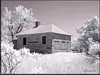 |
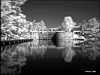
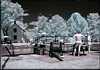
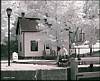
| Davis Lock | Merrickville Blockhouse | Indian Lake | Sweeney House |
 |
 |
 |
 |
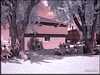
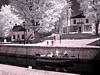
| Davis Lock | Chaffey's Mill | Moored boats | Waiting |
 |
 |
 |
|
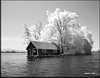
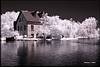
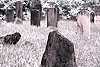
| Boat in Lock | Bedford Mills | McGuigan Cemetery |
| Technical notes: These photographs were taken with a Canon G1 digital camera using a Hoya R72 infrared filter. The use of a digital camera makes taking IR photos a breeze compared to using IR film. Note that not all digital cameras can do IR - check the web for details about your camera's IR capabilities (a quick check can be done by pointing any IR remote control at your camera and see if your LCD viewfinder can see the IR light). The Hoya R72 knocks down exposure by about 5 to 6 f-stops, so photos in bright daylight at ISO 100, f.2.0 are often in the 1/10 to 1 second range. A tripod is recommended, although many of my shots are hand held. A circular polarizing filter can be used in conjunction with the R72 for an even more dramatic effect, at the cost of about 1.5 f-stops. In my research on the topic, it was also recommended that exposures be done at a high f-stop to maximize depth of field. This will drive exposures into the +1 second range. The reasons is that IR light focuses differently than the visible spectrum, so your camera's focus will be fooled. However I have found that with a wide angle setting (which provides a large depth of field), focus is not a significant issue. The Hoya R72 is eqivalent to a Wratten 89b, with 50% light transmission at a wavelength of 720nm. It works well and it is the cheapest of the infrared filters. Deeper IR filters such as the Wratten 87 (800nm) or the 87c (850nm) are more expensive and are more difficult to use (very slow shutter speeds). Using the Hoya R72, photos directly from the camera come out red (see example below). There are several methods to arrive at a B&W infrared photo. Shots can be taken with the camera's B&W mode, but I prefer to shoot in full colour and then colour reduce the photos. One method of colour reduction is to split the RGB channels and select the green channel for maximum effect. Another is to simply desaturate the photo. In many I prefer to leave some colour, giving the photo a pseudo-sepia look. I also find that using the auto-balance feature in Corel Photopaint (auto-level in Adobe Photoshop) does a wonderful job at creating a nice looking photo (with a few tweaks added later). You'll find examples of an IR photo and colour reduction by clicking on the photo below: 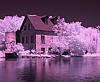 IR photo examples For more information on digital infrared photography, have a look at the Dpfwiw IR website: Infrared (IR) basics for digital photographers (please note that this will take you off this website) |